
Blueprint reader and takeoff tool for Construction Plans Online.

Blueprint reader and takeoff tool for Construction Plans Online.
Measuring
The last button on the tool bar turns on the measuring tool:
![]()
The measuring tool provides a few basic functions designed to allow accurate takeoffs on-screen. Using it is similar to using a digitizer pad, except it doesn't have all the options and functions. And just like all takeoff systems that work from paper, it is only as accurate as the originals. Since you are using images of paper ( not CAD drawings ), always double check, just as you would when using paper.
Whenever the measuring tool is on, this dialog is displayed:
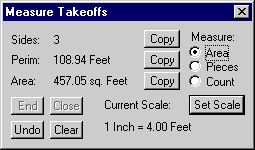
The three "Copy" buttons correlate with the numbers displayed to their left. Pressing a copy button puts the displayed number on the Windows clipboard so that the value can be pasted into another program ( such as a spreadsheet ). To move this dialog out of the way, left drag the title bar ( the blue strip on top ).
Using the measuring tool involves setting the scale, choosing the tool and then placing a series of points to designate what you want to measure. Unlike some digitizer modes, you don't drag the pointer to draw a line; instead, you lay a series of points that define the line or shape. Whenever measuring mode is on, each left mouse click on the image will lay a point.
The first thing to do is to set the scale. Press the "Set Scale" button to open this dialog:
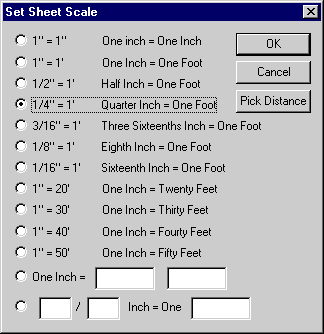
The most common scales are listed. For example, if the drawing states the scale - 1/8" = 1' - and the paper scanned in was a 100% print, then select the scale and hit the "OK" button and the measuring tool will give you accurate scaled results in feet and square feet ( assuming also that the drawing was properly drafted ).
If the scale of the drawing is not listed on the Set Sheet Scale dialog box, then you can use one of the two custom choices on the bottom where the box on the right are the units ( e.g. "Feet" or "Meters" ) and the first boxes are numbers or fractions.
The last way to set the scale of the measuring tool is by picking off a distance and then setting the length of that line. For example, if you need to set the scale using a dimension or graphic scale indicator on the drawing. Start by pressing the "Pick Distance" button. Then place two points that define the known length.

After placing the two points you will see the "Pick Distance" dialog:
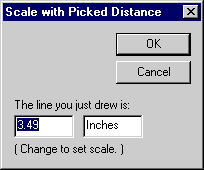
In this example you would change the "3.49" to 90 and change "Inches" to "Feet" and then press "OK." If during this process you misplace one of the two points ( including accidentally clicking ), you must hit cancel and start again.
The Ruler indicates the size of the orginal paper that was scanned in:
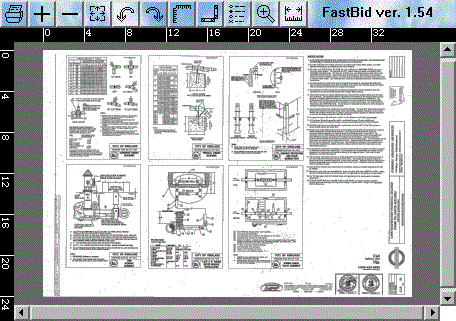
The ruler helps you detect when the displayed image is of a half scale original as well as just knowing how large the drawing is. Anytime you set the scale, you must verify it's accuracy by measuring an object of known size.
With the scale set, you're now ready to measure. The default tool is "Measure Area". This tool allows you to draw a free-form shape with many straight sides. As the shape is being drawn, the display indicates the total length of the segmented line. When the shape is closed, the perimeter and the area of the shape are displayed. To use it to measure the area of a shape, lay a series of points around the shape until there's just one line left to draw. Then press the "Close" button or click on the starting point to close the shape and display the area. After getting the numbers you need, press the "Clear" button to clear the line so you can start the next one. Anywhere in the process you may use the "Undo" button to un-lay a point. Many points may be un-done. The "End" button stops drawing a line without closing the shape, leaving a linear measurement.
Whenever you place a point, a "Zoom Pick" will automatically display ( unless you are already zoomed way in ). A zoom pick is a small window showing the area you clicked on at full zoom. The zoom pick is only displayed while you hold down the left mouse button. It's purpose is to allow you to measure accurately even when a large portion of the drawing is in view and you can't see very much detail.
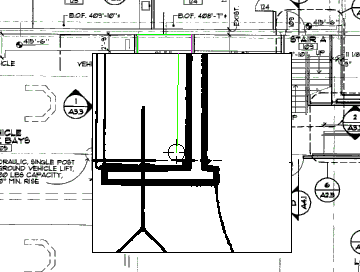
To use the zoom pick, click and hold down the left button as you position the cursor over the feature you're measuring. Let up the left mouse button after positioning the pointer in the enlarged view to accurately place the point. If you are using the zoom pick and need to cancel the last point ( because the desired point is not in view ) just move the pointer outside of the zoom pick window and let up the left mouse button. Remember, if you do place a point you don't want, just press the undo button.
The "Measure Pieces" tool gives you a total linear measurement of separate pieces of line ( instead of connected line segments ):
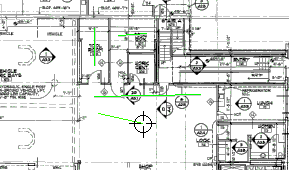
And finally, "Measure Count" lays markers on items that you click, giving you a total count.
Measuring may be suspended at anytime by holding down the Control key on the keyboard (Ctrl). While it is held down, the left mouse button resumes normal zoom box operation. This allows you to readjust the view in the middle of a measurement. A right drag to pan the view can be done at anytime with out the control key.